Showing posts with label Treats. Show all posts

Monday, September 14, 2015

Stampers Dozen Blog Hop - Halloween


Welcome to another Stampers Dozen Blog Hop and THANK YOU for stopping by! I hope you are getting lots of inspiration from everyone to make your Halloween cards, treats and decor.
I was inspired to make a candy holder because I don't send many Halloween cards. And, quite frankly, I have very few Trick-or-Treaters come to my house. The basic directions for this candy holder can be found HERE on Splitcoaststampers.com  and I have added photos of my project in progress here too.

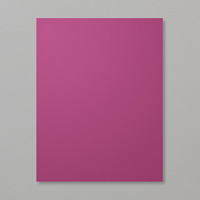
Score a 6" x 7" piece of Rich Razzleberry cardstock at 2-3/4" and 5-1/2"
Add Tear and Tape to the flap and inside edge as shown below.
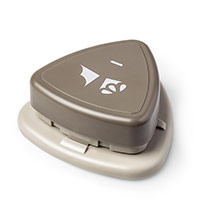
 Before taking the backing off the tape, make the ribbon slot at the top of the holder by lining up the slot punch in the center of the center panel and in the center of the right panel as shown.


 Once you have the two slots punched, fold over and align the holes then put into slot punch and line it up as shown below.  Basically, you will be extending the slot on both sides.


 This is how it will look after you extend the slot on both sides as seen above.
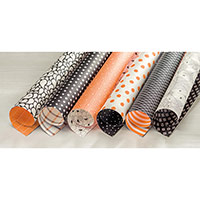
For the belly band, score the 2.5" x 6" piece of DSP at 2-3/4" and 5-1/2" as shown below.
 Stamp the cute owl and wand (from Howl-o-ween Treat) with Archival Basic Black ink and cut out with the Boo to You framelits. Cut the "BOO!" out of Basic Black cardstock with the same framelits.
 Thread 19"-20" of ribbon through both slots and even up the ends.
 Insert a candy bar, between the ribbons, down into the pouch, pushing the ribbon down in with it.
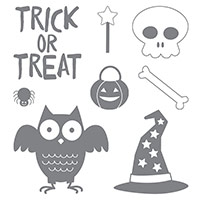
 Tie a knot and bam! there you have it. The owl is dimensionaled onto the belly band. The googly eyes, that my friend, Carol N. gave me, were added with mini glue dots.
 Whooo wouldn't love to get this is their Trick-or-Treat bag!?!? 


That is all for today. I hope you will use your creativity to make a few of these for Halloween. Now it is time to move along to Patty Chenail's blog by clicking the "Next Blog" button below. Or, you can return to Carol Payne's blog by clicking "Previous Blog" button.  Scroll down to see all the products used to make this project.  Simply click on any of the products you need and you will be connected to my store to order.


http://www.stamppattys.com/2015/09/witches-night-halloween-blog-hop.html


Wednesday, November 12, 2014

Curvy Keepsake Christmas Box

 Hello Stampers!
Thanks for stopping by! You may have seen various versions of this Curvy Keepsake box on-line. Did you know that one of the little tags that comes with this set of framelits fits the Small Oval punch!?! That made putting the cute little Santa hat tag on the treat box a breeze!
Supplies used:
Stamps: Get your Santa On
Card stock: Cherry Cobbler, Basic Black (cut in 1/2 strip), Silver glimmer paper
Accessories: Petite Curly Label punch, Small Oval punch, Owl Builder punch (buttons), Silver 1/8" ribbon, glue dots, multipurpose glue.

Well, then, while I had that CUTE "Get Your Santa On" stamp set out, I just HAD to make this tag. The hat was punched this time with the 7/8" scallop circle punch and added to the tag with a Stampin' dimensional. The layers are 3" Cherry Cobbler square, 2-3/4" Old Olive Square and 2-1/2" Whisper White square sponged with Crumb Cake ink. Of course I used Memento black ink because I used Cherry Cobbler and Old Olive Blendabilities to color the image.
I hope I have inspired you to "get your santa on" and get crafting for Christmas! Tell me, who wouldn't like to get this little box with some chocolates? Nice to have on hand for those unexpected visitors.
REMINDER: Don't forget to stop back this weekend and take the Stampers Dozen Blog Hop!! You can start here on my blog and click to visit 12 other extremely inspiring blogs! Mark your calendars for the 15th each month to follow this blog hop monthly.
See you soon,
Judy

Thursday, January 16, 2014

Valentine Treats


Hi Stampers!

Thanks for stopping by! I created some very QUICK, CUTE and EASY Valentine treats today using the new Scalloped Tag Topper Punch and Countless Sayings #2 photopolymer stamp set. I cut the card stock to 5" x 2" (minus a sliver) the punched both ends. After punching, I scored at 1-7/8" and 2-7/8". After wrapping Hershey Nuggets with Polka Dot Parade designer series paper, I glue dotted them into the middle then tied a 5-1/5" length of Real Red 1/4" stitched grosgrain ribbon. Adorned with the heart cut out with the the #1 Star Burst framelit mounted on a piece of Silver Foil Sheet punched with the 1-1/4" scallop circle punch, these are too cute in person!
Very quick and easy to make multiples!! Click HERE to shop my on-line store to order the supplies to create these adorable treats.

Happy Stampin'!
Judy