Showing posts with label Halloween. Show all posts

Monday, September 14, 2015

Stampers Dozen Blog Hop - Halloween


Welcome to another Stampers Dozen Blog Hop and THANK YOU for stopping by! I hope you are getting lots of inspiration from everyone to make your Halloween cards, treats and decor.
I was inspired to make a candy holder because I don't send many Halloween cards. And, quite frankly, I have very few Trick-or-Treaters come to my house. The basic directions for this candy holder can be found HERE on Splitcoaststampers.com  and I have added photos of my project in progress here too.

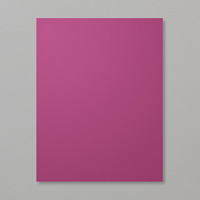
Score a 6" x 7" piece of Rich Razzleberry cardstock at 2-3/4" and 5-1/2"
Add Tear and Tape to the flap and inside edge as shown below.
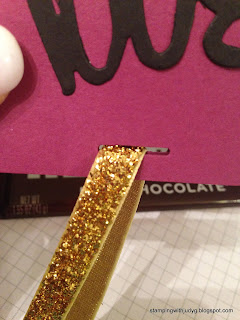
 Before taking the backing off the tape, make the ribbon slot at the top of the holder by lining up the slot punch in the center of the center panel and in the center of the right panel as shown.


 Once you have the two slots punched, fold over and align the holes then put into slot punch and line it up as shown below.  Basically, you will be extending the slot on both sides.


 This is how it will look after you extend the slot on both sides as seen above.
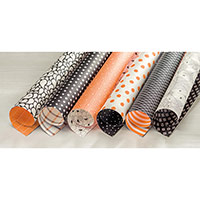
For the belly band, score the 2.5" x 6" piece of DSP at 2-3/4" and 5-1/2" as shown below.
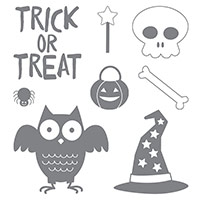
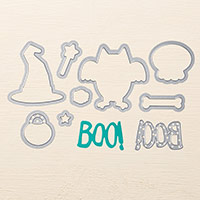
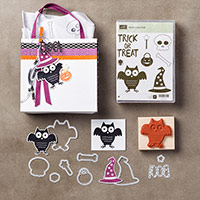
 Stamp the cute owl and wand (from Howl-o-ween Treat) with Archival Basic Black ink and cut out with the Boo to You framelits. Cut the "BOO!" out of Basic Black cardstock with the same framelits.
 Thread 19"-20" of ribbon through both slots and even up the ends.
 Insert a candy bar, between the ribbons, down into the pouch, pushing the ribbon down in with it.
 Tie a knot and bam! there you have it. The owl is dimensionaled onto the belly band. The googly eyes, that my friend, Carol N. gave me, were added with mini glue dots.
 Whooo wouldn't love to get this is their Trick-or-Treat bag!?!? 


That is all for today. I hope you will use your creativity to make a few of these for Halloween. Now it is time to move along to Patty Chenail's blog by clicking the "Next Blog" button below. Or, you can return to Carol Payne's blog by clicking "Previous Blog" button.  Scroll down to see all the products used to make this project.  Simply click on any of the products you need and you will be connected to my store to order.


http://www.stamppattys.com/2015/09/witches-night-halloween-blog-hop.html


Friday, September 20, 2013

Halloween - Triple Play - Day 5

 Hi Stampers!
Welcome to the last day of the Week of Halloween.  This card was swapped by Loretta Howard. She used the "chevron" piece from the Thinlits Circle Card then, used the punched pieces on the inside of the card. Clever indeed!
 This card, by Liz Keehn, was done with the Tape It stamp set (the one she was not going to get) She has really done some remarkable cards with this set. Now, a confession, I cannot find the card that Stephanie Lopez swapped. It was very similar to mine but used designer series paper. Sorry Steph!
Finally the haunted house card, by Aileen Olenius, used Sahara Sand card stock and the now retired spider web embossing folder and house. However, the haunted house is in the "Best Of Halloween" stamp set that is still available.
Hope you enjoyed the week of Halloween!!
Happy Stampin'!
Judy

Thursday, September 19, 2013

Halloween - Day 4

 Hi Stampers!
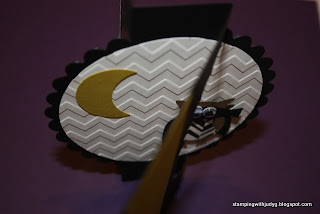
LOOK at this CUTE little guy!! He was made by Misty Kulik for our swap. She made a swing card the old way using the scallop circle Bigz die. She, of course, used the Owl Builder punch to make this little character. She also used Halloween Bash stamp set from the Holiday catalog.
 Once again, the Chevron embossing folder was used. Apparently, there is something about Halloween and Chevron...LOL.

 At this angle, you can see the owl and the moon on one side...
And the inside is shown here.  Thank you, Misty, for this swing card!
Till tomorrow,
Happy Stampin'!
Judy

Wednesday, September 18, 2013

Halloween Shared - Day 3

Hi Stampers!
Here is the card I swapped at the meeting. It is quite simple but uses the Chevron Embossing folder on the Pumpkin Pie upper part of the card. It incorporates some Witches' Brew Designer Series Paper and a strip of Witches Brew Designer WASHI TAPE. I originally did the images in our new orange and Black glitter however, I think my Heat and Stick powder was a little too old. I could not get the glitter to stay put!
\
That's it for today.
Happy Stampin'!
Judy

Tuesday, September 17, 2013

Halloween Shared, Day 2

 Hi Stampers!
This second card swap I got was made by Kristin Grahmann. She used the Bootiful Occasions stamp set and just the right Halloween colors on this technique rich card.  It is hard to capture the true WOW of this amazing card. She used Daffodil Delight, Rich Razzleberry, Old Olive and Pumpkin Pie card stock along with various sized circle punches and the chevron embossing folder. It makes a great background! The focal point is a paper bow made with the oval punch.
She used the Larrge Oval and the Extra-Large Oval punches to made the bow that was curled upward with her bone folder.  Here is a close up angled shot in an attempt to show you the dimension of the card.. She used. Another really great card! Thank you Kristin!
Happy Stampin'!
Judy

Monday, September 16, 2013

Halloween - shared


Hello Stampers!
We had a Fall/Halloween swap at our demonstrator group gathering this month. This week I am going to share some of the swap cards I received. They were all awesome!! This card was made by Kim Moore. She used the Bootiful Occasions stamp set with Tangerine Tango, Elegant Eggplant and Old Olive cardstock. I especially like the way she colored the boot and added the darlin' little candy dots on the bottom.


   Kim's card showcased the marble background technique.  She used one of the old wood mount stamp cases, drizzling craft white re-inker and Olive Green re-inker onto the deep side of the case. A few marbles, purchased at a Dollar store were added and rolled around with the top closed, face up.  She then opened the case and adhered the Elegant Eggplant card layer to the inside of the "lid" of the plastic case. After rolling the marbles in the ink, she tipped the closed stamp case upside down and let the marbles roll over her card stock. Really neat looking background for this adorable card.

Thank you, Kim Moore, for the awesome card and, Thank YOU for stopping by today!
Happy Stampin'!
Judy