Showing posts with label Punches. Show all posts

Wednesday, February 18, 2015

Painted Floral Birthday

Hello Stampers!
Today I want to share a card I made for a Leadership swap.  I made 32 of these so I learned a few tips to share with you. Here is the "recipe" for this card:

Stamps: Petal Potpourri (Occasions catalog "OC" pg 23, Butterfly Basics (OC pg 26)
Card stock and Ink: Blackberry Bliss, Daffodil Delight, Old Olive and Whisper White
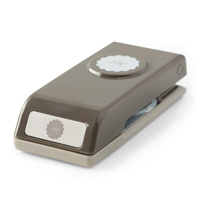
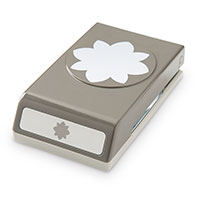
Other: Spring Flowers Textured Impressions Embossing Folder (OC pg 19), Flower Medallion punch (OC pg 23), 7/8" Scallop Circle punch (Annual Catalog "AC" pg 220), Handheld 1/4" circle punch (AC pg 223), Stampin' Sponges (AC pg 210), Stampin' Dimensionals, Glue Dots, Multipurpose Liquid glue (AC pg 204), scoring tool. 

Now, let me thank Connie Stewart for inspiring me with her "flash card" idea. I used the "flash cards" (4" x 2-1/2" layered onto 4-1/4 x 2-3/4) for the center of my focal point. Painted Blooms Designer Series Paper (OC pg.19) was layered onto Blackberry Bliss cardstock.
I used a Stampin' Pierce mat to stamp all the flower pieces onto Whisper White card stock then punched them out. Because each card needed 2 leaves, I needed to find an efficient way to make them, sponge them and adhere them. Here is my tip:
I used some 1-1/2 inch scraps of Old Olive card stock that was left from a different project.
 Used my Simply Scored to score at 3/4" (in half)

 Next I put the scored strip into the Flower Medallion punch being sure to line the score marks up with the tip of the larger petals as shown.

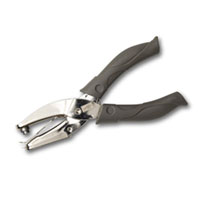
 I cut the excess off with my snips leaving a nice size piece to hold onto while sponging both ends with Old Olive ink.
 Once sponged, I cut it into the two leaves I needed per card. This saved a bunch of time! A tiny dab of multipurpose liquid glue held the leaves to the back of the flower. Glue dots would also work.
On the flower itself, the 1/4" circle was adhered with a glue dot and the Daffodil center was adhered with dimensionals. Also, the entire flower was adhered to the card front with dimensionals.
Finally the sentiment was stamped onto a 1" strip of Whisper White and layered onto a 1-1/4" piece of Blackberry bliss. Dimensionals used to adhere this piece as well.
Let me know if you have any questions.
THANK YOU for stopping by again today!
Happy Stampin'!
Judy


Tuesday, April 8, 2014

Springtime Hello with a Punch


Hello Stampers!
Thank you for stopping by again today! I wanted to play with this particular lay-out, similar to the split negative. The card base is Coastal Cabana with a 2-1/8"x 5-1/4" piece of Strawberry Slush on the left. The main image was stamped from Springtime Hello onto a piece of Whisper White card stock measuring 2-3/4" x 4" backed with the two strips of cardstock measuring 1-3/4" x 4-1/4"  Then, for fun, I stamped images from Petite Petals and punched them out with the Petal punch, one of the flowers from the BoHo Blossom punch and the tiny flower from the punch pack.  I just LOVE the little bee in the Springtime Hello set!
I hope you are inspired to try this layout with various colors. Please send me a pix of your creations!
Happy Stampin'!
Judy

Tuesday, September 24, 2013

Tutorial Tuesday

 Hi Stampers!
Thanks for stopping by. Doesn't the title of this post somehow indicate that I may continue with Tuesday Tutorials? Hmmm...Wonder if that will happen!?!?!?   You know, I had a LOT of the Season of Style designer series Paper Stack (132181) left with this Crumb Cake with Whisper White dot on it. It just did not say "Christmas" to me but it definitely says "Birthday".  To make this card, I used:
Crumb Cake (126975)
Pool Party (126982)
Pink Pirouette (126956) Ink
and the same colors of cardstock along with a little Old Olive cardstock scraps for the leaves.
I am not going to lie...this uses a LOT of punches! I used the following punches:
2-3/8" Scallop Circle 118874
1-3/4" Scallop Circle 119854
3/4" Circle Punch  119873
Large Oval Punch 119855
Artisan Label Punch 130920
Bird Builder Punch 117191 (leaves)

 Plus, I used the Chevron embossing folder (127749) and a framelit from the Apothecary Accents set of framelits (127003)
 As you can see, I sponged around every piece of cardstock on this card.
 To be sure everything was lined up, I laid the Pool Party Seam Binding (125582) on my Grid Paper (130148) at one inch then placed my designer paper face down lining up the outside and bottom edge to the grid paper. I ran a little Snail (104332) vertically along the outside edges, and bent the ribbon around, catching it on the Snail adhesive.
 As seen in the photo above, 1) after sponging the Artisan punched piece, I cut it in half and used Tombow to adhere it to the back of the Crumb Cake piece. 2) The dimensionals are strategically placed to support the attached piece and ALSO catch a part of the Seam Binding Ribbon to hold it in place on the front of the card.

 NOW...to make the flower!  I started with Strawberry Sluch 3/8" Ruffle Stretch Trim Ribbon.
 I started rolling the ribbon, very tight at the onset and continued wrapping it around and around until it was about 3/4" in diameter.
 I punched a 3/4" circle from Strawberry Slush card stock (although this photo makes it look orange) Ugh.
 Then, I got a scrap piece of Sticky Sheets. These are retired but not we have the EASIER Sticky Rounds (127852). If you do not have either of these, you can simply line sticky strip onto your circle....more time consuming but, doable.
 I used the circle I punched in the card stock to trace a circle onto the back of my Sticky Sheet
 Then cut it out.

 Now I had one 3/4" round piece of card stock and the same size double sided sticky!
 I removed the white side and placed it on my card stock circle then, when ready can remove the orange side and it be ready for the flower to be placed onto it.
 Here is a photo showing that the twisted 'round ribbon should be the same size as your sticky circle.
 To stop winding, cut the ribbon and add a glue dot.
 Next I placed it on the sticky round.
 Then I mooshed (is that a word?) it out with my fingers to make it "fuller."
 Finally, I added the little leaves from the Bird Builder punch.

Hope you liked my tutorial on making the Ruffled Stretched Trim Ribbon Flowers. If you did, why not leave me a comment. That would make my day!!
Thanks again for stopping by!
Happy Stampin'!
Judy

Friday, September 3, 2010

Halloween is coming!

Hi Stampers!
Can you believe it is time to get ready for Halloween already!?! I wanted to share a card we made at our August hostess clubs. It is made with the Wicked Cool stamp set on page 23 of the Idea Book and Catalog. We used every stamp in the set and had a great time doing it! We used the new Bitty Bat punch and "blinged him up" with the fabulous new rhinestones. We also stamped the inside of the card as seen below.
How fun is this card?!?
Products used:
Card stock: Pumpkin Pie, Whisper White, Basic Black and Wicked Fun designer series paper
Ink: Basic Black ink pad, B. Black, Pumpkin Pie and Old Olive markers
Punches: Scallop border, Scallop trim, Scallop trim corner, 1 1/4" square, 1 3/8" square, Bitty Bat
Other: Rhinestones, sponges.
Have questions? Just ask!
Happy Stampin'! 
Judy

Tuesday, May 25, 2010

Fourth of July Card

 
Hi Stampers!
 It is not too early to think about the Fourth of July and using up some of your scraps and retiring paper.
Supplies you will need for this card:
Stamps: Fourth of July
Card stock: Real Red 8-1/2" x 5-1/2", scored at 4-1/4", Brilliant Blue (soon to be retired) 4-3/4 x 3-1/2, Whisper White scraps
Ink: Real Red
Accessories: Real Red Satin Ribbon, larger of the two Star Punch, Dimensional (to dimensional the bottom right corner star up over the existing star.
Hope you have fun with this quick and easy card!
Happy Stampin'!
Judy


Posted by Picasa