Hello Stampers!
THANK YOU for hopping along with us on this Hoppity Hop Hop blog hop!
How is that for a lot of hopping!?!? What did you think of Carol's project!?! Awesome, huh?? She is one very talented lady!!
For my project, I made a little basket with our awesome envelope punch board. Here is my project, followed by a pictorial tutorial to make it. I used Watercolor Wonder designer series paper to make the basket. It is so quick and easy, I "hop" you are inspired to make one of your own! What little kid (or big kid) won't LOVE to receive this!! Remember, you can click on any photo to enlarge it.
Here is Hoppity's front...
Here is Hoppity's back...
Click on the "Next" or "Previous" to move along to another blog. SCROLL DOWN if you would like to view the tutorial.

Happy Stampin'!
Judy
I am using white card stock to instruct this tutorial for demonstration purposes only. You would use designer paper or colored card stock.
First, you need an 8" x 8" piece of card paper
Line it up at the 2" mark on the envelope punch board, punch and score.
Turn and do this same thing on the other three sides.
Next, FLIP THE PAPER NORTH TO SOUTH and line up at the 2" mark and punch all four sides till it looks like this photo.
Flip your paper back over to the original side. Line up the bottom edge of the punch-out with the SCORE LINE (nothing matter along the top edge) and SCORE. Do this on all four sides.
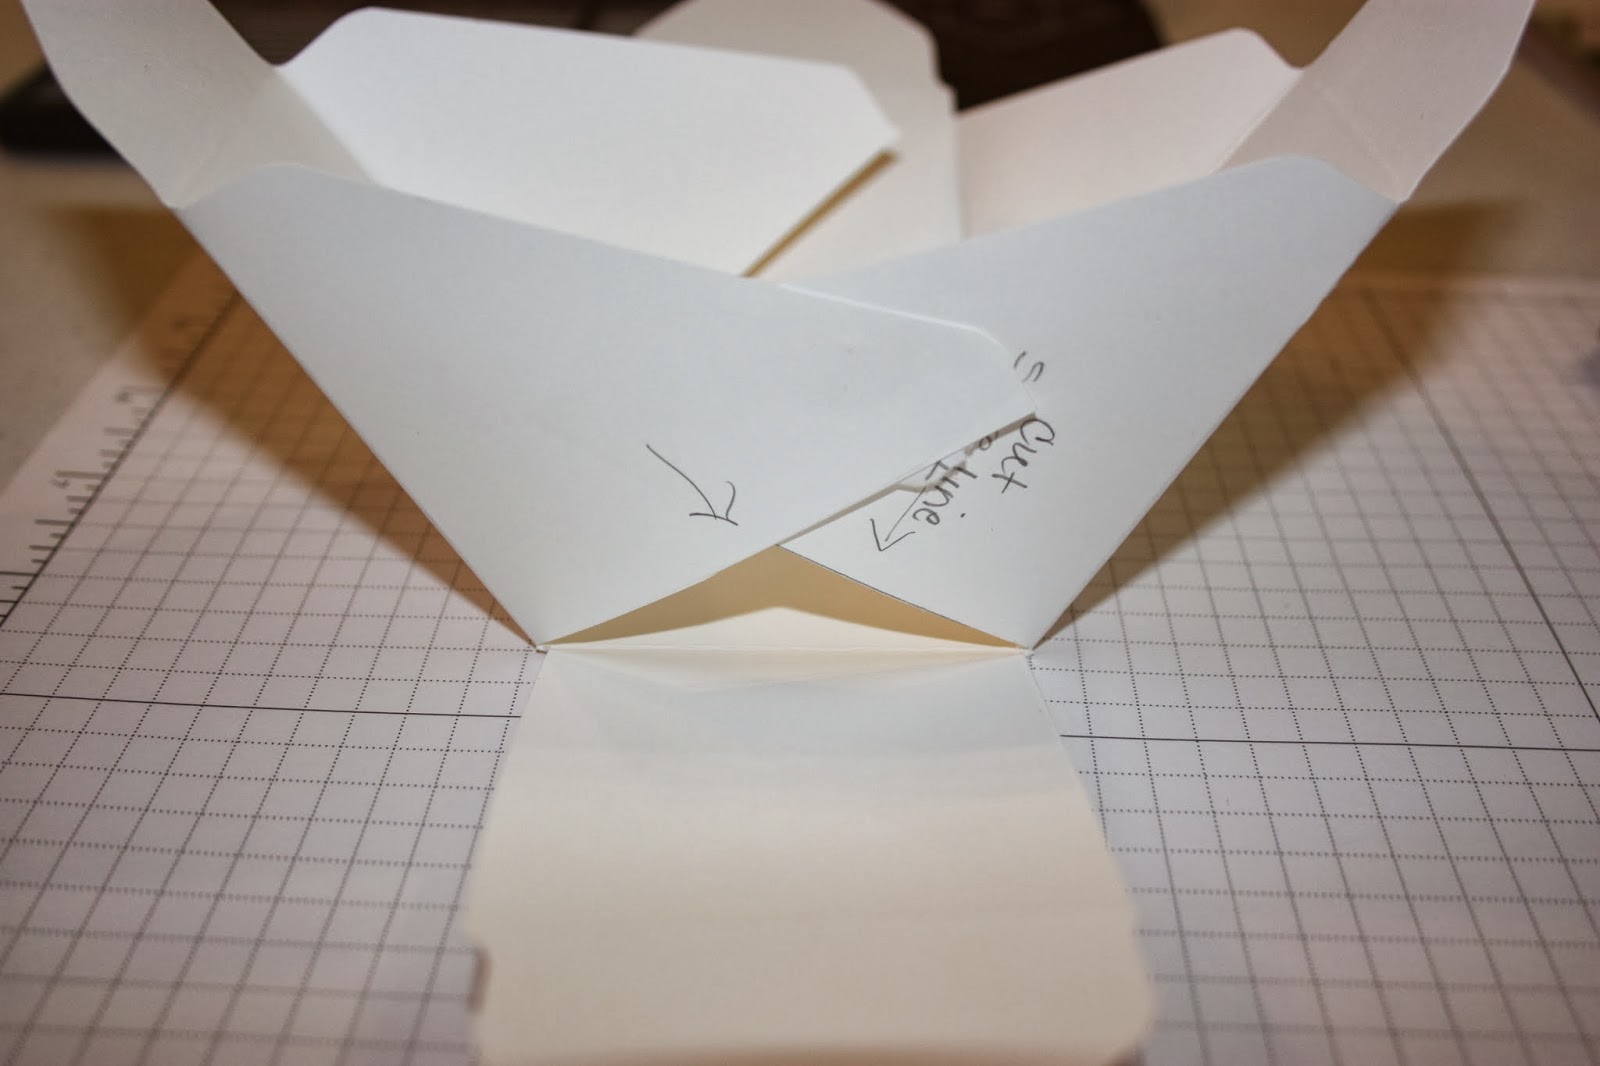
Cut OUT the score lines on two opposing sides. (it does not matter which two, just so they are across from one another) See photo
Fold all score lines. Match up the cut angled pieces and adhere. Be sure that when you fold the large flap up, the ends of the angled pieces are hidden behind it. Notice the open triangle at the bottom. This is what it should look like.
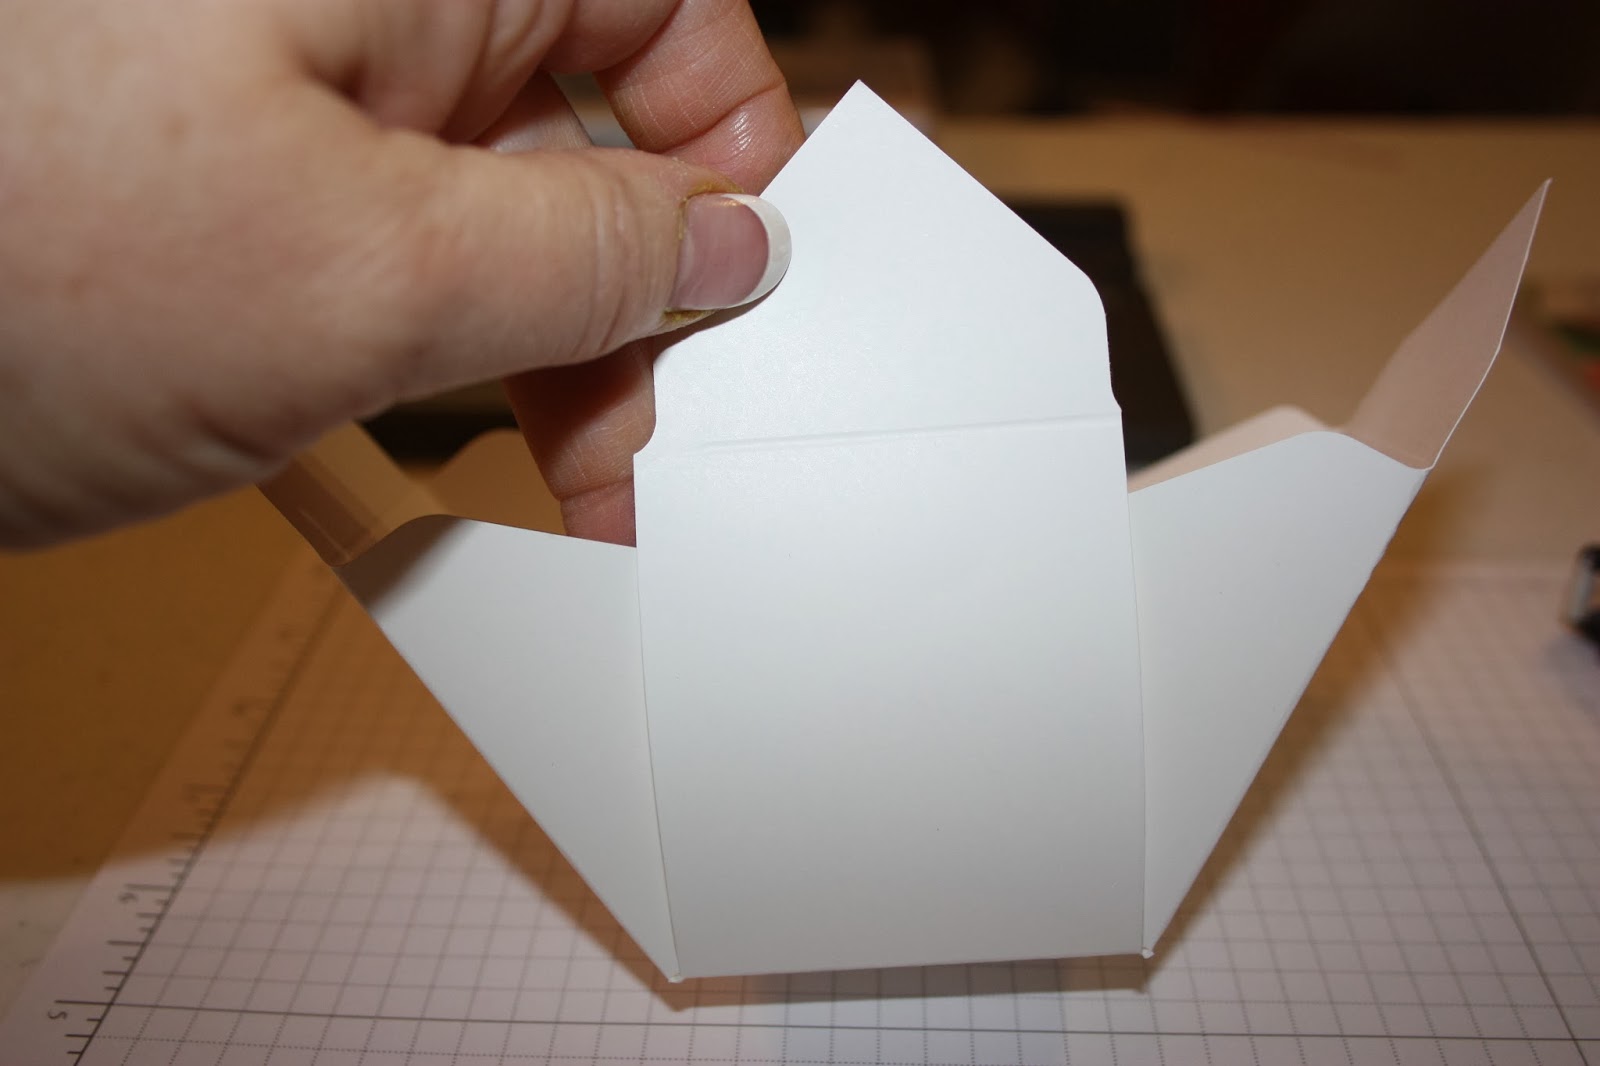
Next, you will notice that the score line we made on the long flap does not line up with the top of the basket.
That is OK! It is PAPER! FORCE it into submission then crease it!! Don't you feel powerful now!! I know I did...LOL...
I
I used Tombow multipurpose glue to adhere the flaps.
And, the side flaps.
This is the finished project. Then, I took a 1-1/4" x 12" strip from the left-over designer paper to make the handle.
I used these framelits, positioned this way on Whisper White card stock to make my bunny.
These are the punches I used with the colors written on the photo.
I made the bunny tail from a 3" x 12" piece of filter paper
I folded it in half once and secured it with snail adhesive
I folded it again and adhered it with snail.
I then cut up the NON ADHERED side.
Using the nifty new fringe scissors, I cut along the open edge of the filter paper.
I used Snail along taped edge (sticky strip might have worked easier but I wanted it less bulky) before I began twisting the strip.
I used my tweezers to hold an end and then started twisting until my tail was the size I wanted. Then I snipped the remainder of the strip off.
Here is the tail that I glued to the bunny butt. How stinkin' cute is that!?!?!?
Hope you make one of these in time for Easter! Works great for presenting someone with a little candy too. Use the bow die to add a bow to the basket instead of the bunny!


 t
t