

Hello Stampers!
Thank you for joining us for this blog hop! Didn't you just love what Carol shared?!?
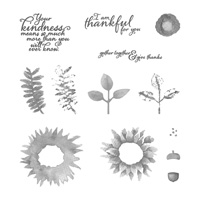
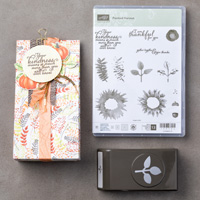
This is my quick and easy card using the Painted Harvest suite and four punches. Using the punches only is what makes this card so fast to prepare. I hope you like it and will be inspired to purchase this set (and the punches) if you don't already have them...

I am so often in need of a Thank You card. And, who would not LOVE to get a thank you note for showing kindness towards me (or you)?

Below are the detailed Instructions:
Stampin’ Up! Supplies:
- STAMPS – Painted
Harvest (144783-polymer, 146021-bundle)
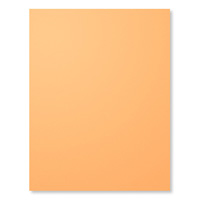
- PAPER – Peekaboo
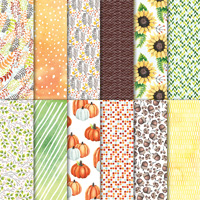
Peach (141417), Early Espresso (119686), Gold Foil Paper (132622), Painted
Autumn Designer Series Paper (DSP)(144613)
- INK – Early
Espresso (126974)
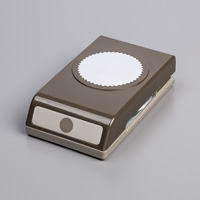
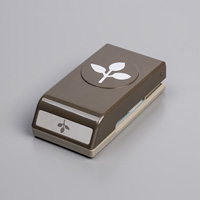
- OTHER - Starburst Punch (143717), 2 ¼” Circle
Punch (143720), 2” Circle Punch (133782), Leaf Punch (144613), Dimensionals (104430), Multipurpose
Liquid Glue (110755)
Cutting & Scoring:
- Peekaboo Peach -
8 ½” x 5 ½”, score and fold at 4 ¼”, scrap to punch
- Early Espresso –
5 x 3 ¾”, scrap to punch
- Gold Foil – 2 ½”
x 4”
Designer Paper – ¾” x 5”, 1
½” x 7”
Instructions:
- Stamp the
sentiment in Early Espresso on the scrap of Peekabo Peach and punch out
with 2” circle punch. Punch the Starburst from Early Espresso scrap. (or
from the center of the Early Espresso panel) Punch a 2 ¼” circle from the
Gold Foil. Layer these and adhere together.
- Using the Leaf
Punch, punch 2 Gold Foil and 4 DSP leaves. Adhere to the back of the gold
layered circle as shown. Add dimensionals and set aside.
- Adhere the ¾”
strip of DSP to the left side of the Early Espresso panel,
approximately 3/8” from left edge.
Then adhere this panel to the card front.
- Adhere
the focal point to the center of the card front as shown. (Be sure if you
punched the Starburst from the Espresso panel that it is completely
covered)
- Finish
inside of card as desired.
In case you did not notice, the two patterns of Painted Autumn DSP are front and back of the same sheet. (TIP): If you are cutting for multiple cards, cut the 1 1/2" x 7" strip the whole 12" length of the DSP. Cut that strip at 7" leaving 5" strip. Cut this in half at 3/4" and you have (2) 3/4" x 5" strips to use on card fronts thus getting the most out of your DSP.
I hope you will be inspired by our blog this month. In case you do not have a demonstrator, I would love to earn your sales. To order, click on the image of what you would like to order.


Thanks again for stopping by. Now it is time to hop along to Rachel's blog for more inspiration from this talented lady!


Love punched DSP leaves. Great idea!
ReplyDeleteThank you Sharon! Easy card for a class.
ReplyDelete