Stampers Dozen Blog Hop - November - Christmas/Holiday edition
Hello Stampers and, WELCOME to the November edition of the Stampers Dozen Blog Hop. Here is my idea for a rather unique Christmas card.
I was inspired by Mary's fall/grateful "pocket card" that can be seen HERE. This is a card that has the focal point (the holly) hanging on the outside of the pocket but actually attached to the card inside. I was totally going to have ornaments hanging over but soon, to my dismay, found I could not get them to work very well. However, as I stood holding the ornament framelits and looking at the belly band on the pocket card, the holly on the designer paper jumped out at me. Since we do not have a holly die, I had to make my own holly. I used the ornament framelits to make the holly. Basically, cut the longer, narrow ornament out of Old Olive card stock then, after scoring and folding in half, use a 1" circle punch to shape the holly. I sponged the holly edges with Mossy Meadow ink. The three holly leaves are glued together and a bow made with the 1/8" gold ribbon was added with a glue dot. Finally it was adhered to the inside card on two dimensionals stacked one atop the other to give it the height needed to hang over the pocket. Only after I adhered the holly did I stamp the inside sentiment.
I hope you like this and will be inspired to make your own pocket card. Quick, easy and a WOW...just what we look for, right?
The recipe:
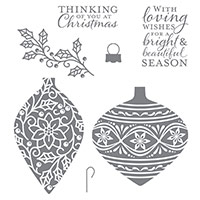
Stamps: Embellished Ornaments
Ink: Cherry Cobbler, Mossy Meadow
Paper: Cherry Cobbler 4.25" x 9.5" scored at 5.5", Mossy Meadow 4" x 5.25", Whisper White 3.75" x 5", Season of Cheer DSP 1.25" x 9.5"
Accessories: Home for Christmas Enamel Dots, Stampin' Sponges, 1/8" gold ribbon, White 3/8" Glitter Ribbon approx. 9.5"
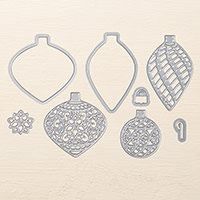
Tools: Project Life Corner punch, Delicate Dots textured impressions embossing folder, 1" circle punch, Delicate Ornament Thinlits Dies, stampin' dimensionals, mini glue dots, multipurpose adhesive.
If you are a more visual learner, I have done a video for you.
As most, I thrive on comments. Would love to hear from you.Thanks again for stopping by. Now, on to Patty's blog to see what she has in store for you!!
Or, in case you missed Carol's, you can go back and look at her project.
If you would like to order any of these products, simply click on the photo and you will be directed to my on-line store. Thanks!!
I really like this card. Thanks for the idea. I never thought to use the ornament framelits to make a holly leaf. I like that and ideas are running crazy right now


Enjoy the video and the card holder. Very nice.
ReplyDeleteThank you Sandi! I appreciate your kind words.
DeleteWhat a neat little card. I really appreciate you taking time to do the video tutorial. Thank you!
ReplyDeleteGlad you like it Vicky! Thank you for your comment.
DeleteI really like this card. Thanks for the idea. I never thought to use the ornament framelits to make a holly leaf. I like that and ideas are running crazy right now
ReplyDeleteThank you Gaylene! Love it when ideas run crazy! Glad you were inspired.
DeleteLove it!! Great card, Judy. Loved your video.
ReplyDeleteThank you!!
DeleteGreat idea!
ReplyDeleteThank you BJ!!
Delete